Being a smart phone user and with WiFi connection being a norm these days, having to experience Android WiFi authentication problem on your android device is meant to happen.
Even if you do not experience it now, you may experience it later. However, this shouldn’t put you off-balance. There is always a solution.
Have you ever tried signing into a WiFi network on your Android phone and rather than it displaying connected, you are faced with an authentication problem?
Often at times, this isn’t the first error shown. Usually, it begins with you inputting the correct password, tapping the connect option. Thereafter, it shows connecting and just when you thought it’d connect, it displays authentication problem or error.
On this post, I will be discussing with you, what could cause this problem on your Android phone and thereafter, proffer the solutions which are guaranteed to help fix the problem.
So, without further ado, let’s begin with understanding the problem. I mean, that’s the first step, right? After all, you need to know the problem before a solution is possibly met, right?
Table Of Contents
- What Causes Android WiFi Authentication Problem?
- How To Fix Android WiFi Authentication Error
- Solution 1: Fix WiFi Network Password Change
- Solution 2: Be Within WiFi Network Reach
- Solution 3: Verify Wireless Name For Duplicates
- 4. Solution 4: Modify Wireless Network Configuration
- Solution 5: Turn On / Off Airplane Mode
- Solution 6: Reset Network Settings On Android
- Solution 7: Make Sure Android Device Software Is Up-To-Date
- Solution 8: Switch Between Stock Firmware and Custom ROM
- Solution 9: Factory Reset Android Phone
- Wrapping Up
What Causes Android WiFi Authentication Problem?
This error basically shows up when you try connecting a WiFi network. Or, when your Android phone or device tries connecting to a wireless network.
This wireless network may be yours transmitting from a MiFi device or even, your computer’s internet connected being used via HotSpot. Alternatively, it could be one you think you have access to. If the latter is the case, you should confirm the password from the owner.
As earlier mentioned, being able to fix this isn’t far-fetched. You just need to know what to do and how to get it done. And, that’s precisely what this post is about.
How To Fix Android WiFi Authentication Error
Having understood what the problem could be, guess it’s about time we hit the hammer on this nail. By that, I am talking about the guaranteed solution to Android WiFi authentication error.
In this simple guide, I will be giving you 9 solutions. Precisely from the least simple, to the rather advanced guides. You do not have to go through all 9 before taking actions. Take actions based on each solution and, if one doesn’t fix it, move on to the next. You can be sure you’d arrive at a solution at the end of the day.
Solution 1: Fix WiFi Network Password Change
This should originally be the first step of action. If the network source belongs to you, confirm you haven’t mistakenly changed the password. You or anyone who has access to the network settings, may have changed it.
Hence, it’s important you confirm the password is still the same. If otherwise, take action.
In a case whereby the network source belongs to someone else and, you are only graced to use it, you should confirm with the owner if the password has been changed. If that’s the case, you would need to enter the new password.
Usually, when you successfully connect to a WiFi network for the first time, it saves the password for that network on your phone. That way, you do not need to enter the password every time. And, in a case where the password has been changed, rather than automatically connecting, it will display an authentication error.
In this case, you would need to first choose the forget WiFi option. This will then allow you enter a new password and connect. If successful, that new password would be saved.
How To Change WiFi Password On Android
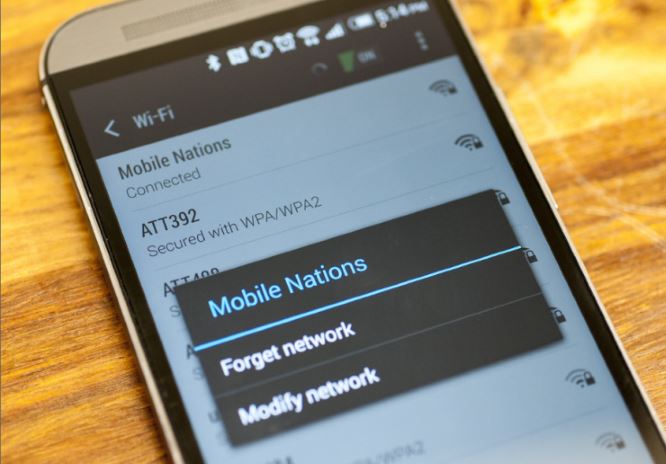
- Go to the Wi-Fi Settings and find the WiFi network name
- Tap and hold on it till you are presented with options.
- Choose the forget network option.
- Thereafter, tap on the network name again, input the new password and choose to connect.
If you entered the correct password this time, you should be set. If however, the problem persists, you should move on to the next solution.
Solution 2: Be Within WiFi Network Reach
You know, for the fact that it displays the network SSID name under the WiFi settings, doesn’t automatically mean you are within the appropriate network coverage for the WiFi network.
Sometimes, this problem could be courtesy of your phone not properly within reach. A good starting point in this regards, is to make sure you have a relatively good network strength. The bars displayed, should give you an insight.
If it’s displaying a low signal strength or the signal bar is really low, try moving closer to the network source. Make sure the signal is much higher. Thereafter, try connecting.
If again, that didn’t fix it, do move on to the next solution.
Solution 3: Verify Wireless Name For Duplicates
Are you using a unique name for your wireless network connection or, you are using an easy to figure out username?
Once upon a time, I once stumbled on a Wi-Fi SSID named Virus. Sounds weird, right?
Well, technically, that’s the idea. Not everyone would want to name their wireless hotspot as virus. But, for the purpose of being unique and in some cases, sending some negative signals to people who may want to hack the WiFi, they had to name it as such.
For most Android phones, the SSIDs can be identical. For example, most Android phones tend to use the phone’s name and model as the SSID when switching the hotspot feature on, for the first time.
Now, imagine other persons using the same phone and are within reach with their phone’s hotspot turned on as well. It can get really confusing. Hence, it’s important you verify you are entering the correct password for the correct SSID. If the WiFi network is yours, I would recommend going with a unique name that’s easy to differentiate from others within reach. Get creative.
4. Solution 4: Modify Wireless Network Configuration
Believe it or not, sometimes, an IP conflict can cause WiFi authentication issue. This isn’t any different from an android phone. It works in relatively the same pattern.
Hence, having to change the Wireless network settings of your Android device from its default DHCP settings to static IP is probably something to try out.
To do this, please follow the steps below:
- Go to settings on your Android phone and tap on Wi-Fi. Some android phone has it as ‘Wireless or Wireless connections‘.
- Long press on the WiFi SSID and some options will be displayed. At this point, tap on Modify Network. In some phones, it’s displayed as modify network connection. Whichever the case, tap on modify and NOT forget.
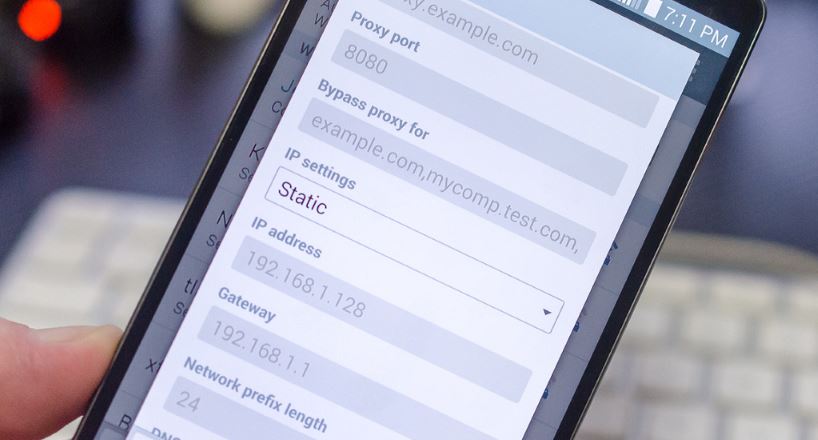
- Check the box next to show advanced options then, seek out IP settings. Change from DHCP to Static. At this point, an IP address field will appear beneath.
- Note down the information stated in the static IP field and delete it. Re-enter the IP and thereafter, save. A simple work-through with this, would be selecting all the IP figures, select cut and thereafter, paste.
- In a case where by you are not sure what IP address, gateway, net mask or DNS to enter, you should contact your ISP (Internet Service Provider) to help you with the details.
When done with that, try connecting. Hopefully, that should fix the issue and automatically connect you to the wireless network without experiencing authentication error. If otherwise, let’s move on.
Solution 5: Turn On / Off Airplane Mode
For the most part, Airplane mode can be really handy. Remember the post where I talked on how to screenshot Instagram stories without them knowing? Airplane mode pretty much does the trick.
It isn’t any different in the case of WiFi network connection issues. Usually, the airplane mode is a fix to some Android problems that does not require switching off the phone. As funny as it sounds, airplane mode could also serve as a Wi-Fi fixer.
To fix the Wi-Fi issue using airplane mode, follow these simple steps:
- Swipe down from the top to display the notification tray and quick settings menu.
- Turn Off Wi-Fi and mobile network
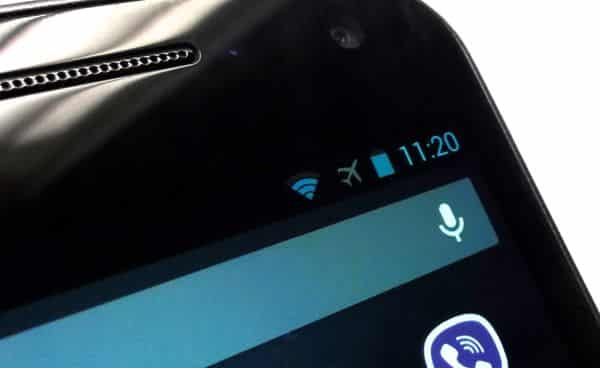
- Having turned both off, turn ON Airplane mode. Usually, this is also shown in the quick settings menu.
- When Airplane mode is turned on, turn ON Wi-Fi and connect to the wireless network connection.
In the case where this works, turn back ON the mobile network. Otherwise, you wouldn’t be able to receive or makes calls. You cannot do any of those while in airplane mode.
Again, this may sound unconventional however, it has been proven to fix the WiFi authentication issue. Especially in a case where there seem to be a conflict between the mobile internet connection and Wi-Fi network.
Solution 6: Reset Network Settings On Android
By now, you ought to have been able to fix this error on your Android device. However, if for some reason, the problem still persists, having to reset all network settings on your Android device, could be the best bet to fixing WiFi authentication.
This process precisely means having to reset all network connection related settings on the phone. This includes mobile network, wireless network and Bluetooth connection, all at once.
Think of it as hard reset option. Except for it been only connected to the network settings rather than the phone itself.
To do this, please follow the steps below:
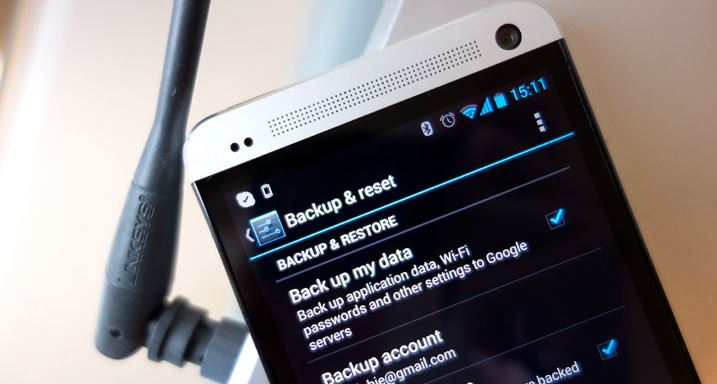
- Go to settings on the phone and scroll down to find “Back up and reset“.
- Navigate to the network settings reset option in the menu.
- Press the Reset Settings button at the bottom of the page and wait till the process is completed.
- Once the process is complete, go back to the Wi-Fi menu on your Android device and try reconnecting to a wireless network. Of course, you should make sure you are inputting the correct password to the Wi-Fi network.
To be sure, this method wouldn’t lead to a loose in your phone’s important data. However, you will lost all initial details regarding network. Hence, you will be required to input a password to the WiFi network connection again. This shouldn’t be an issue as long as it fixes the process. However, be sure to input the correct password to the wireless network this time.
Solution 7: Make Sure Android Device Software Is Up-To-Date
This may seem like an unconventional solution but, it does work. Software updates on devices usually comes with patches and perhaps, new features.
While these patches can have some bugs, new updates tend to fix the previous bugs. Your Android phone refusing to connect to a wireless network could be as a result of a bug, the update could most likely fix it. Hence, making sure your Android device software is up to date, is very important.
To confirm your Android device software is up to date, follow these steps:
- Go to settings on the Android device and scroll down to find the about phone tab. For some phones, it could be termed ‘About’.
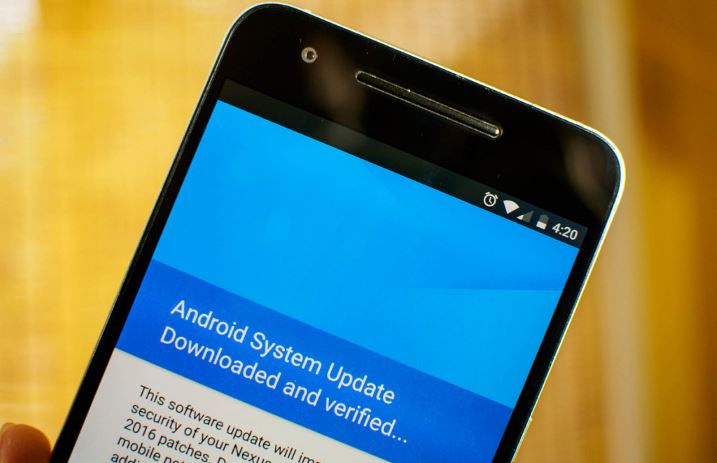
- Under the about phone page, tap on System Updates or Software Updates.
- This can vary for some Android phones. However, if you can find a search box in the settings page, simply input software and tap on the appropriate findings.
- If a software update is available, download and install right away. Since this cannot be done over wireless network since you are unable to connect, you would need to sacrifice your mobile data for this.
When done with the software update, restart your Android phone. Thereafter, try connecting to a WiFi network. If that fixes it, great. If otherwise, you should see the next solution.
Solution 8: Switch Between Stock Firmware and Custom ROM
Consider this as a sequel to the solution 7 above. For some advanced Android phone users, using the basic stock firmware isn’t enough. We want some added feature, we want our phones to stand out from the crowd.
Usually, we like to experiment with custom roms which of course, means ditching the stock firmware. However, these customs rom can have some bug. As a matter of fact, this leads me to a once upon a time story.
Some couple of years ago, I was experimenting with my Sony Xperia x10. This device had a couple of custom Roms available on the XDA forum and I must say, it was really fun to explore while it lasted.

On the stock firmware which I believe was Android Jellybean or so, the phone couldn’t use the Google play store. I think it was called Android Market at the time. However, upon using a custom rom, the phone was able to use Android market properly. However, connecting to Wi-Fi wasn’t possible. This wasn’t an issue I initially faced with the stock firmware.
Thankfully, I was able to find a patch which fixed the bugs with the custom rom. From my story, Google play store couldn’t be used on the phone with the stock rom. However, that worked well with a custom rom. While wireless connection wasn’t an issue with the stock rom, it was with the initial custom rom.
Hence, If you are technical and you know your way around the technical aspect of Android, switching firmware could fix the issue. Just be sure you know your way around it. Otherwise, abort mission. Getting it wrong could brick your phone.
Solution 9: Factory Reset Android Phone
This is perhaps, the last but not the least solution to Android Wi-Fi Authentication problem. Having to factory reset an android phone, reverts it to its default state.

Factory resetting a phone returns it to the state it was when it was newly bought. Hence, for the most part, this fixes the problem. Be careful though. This is an advanced step. Why? Because it clears your phone of all its data. This includes Gmail accounts attached to the phone as well as every other file and apps that you installed on the device.
The pre-installed apps and files that came with the phone often at times, isn’t affected. However, again, every data will be lost. So, make sure this is a last resort. If deciding this is the way forward, make sure you back up your files before commencing. If not within a computer reach, back up your files to an external flash drive or memory. You should also back up your contacts to your Gmail account.
For a more comprehensive step by step guide on how to do this, please revert to the post which talks on how to hard reset your android phone.
Wrapping Up
Experiencing the error connecting to a wireless network or WiFi Authentication problem on Android can be really disturbing. Especially if the basic solutions doesn’t seem to fix it. However, with this really comprehensive guide, the issue should be fixed. I am really confident of that.
However, if you still tend to face problems having tried all of the steps above, please communicate using the comment session. Also, please consider being explicit in your comment as this will help us understand the situation and proffer a better solution.


